
Points of Interest
Mark parking, trailheads, hazards, facilities, dining, wait times, and other notable locations on your trail map.
Points of interest mark notable locations on your trail map: trailheads, parking, facilities, hazards, and more. Each point has a type (which sets its icon), a name, a description, a status, and an optional hidden setting. Pair them with Notices when you need to call extra attention to something like a full parking lot or a downed tree.
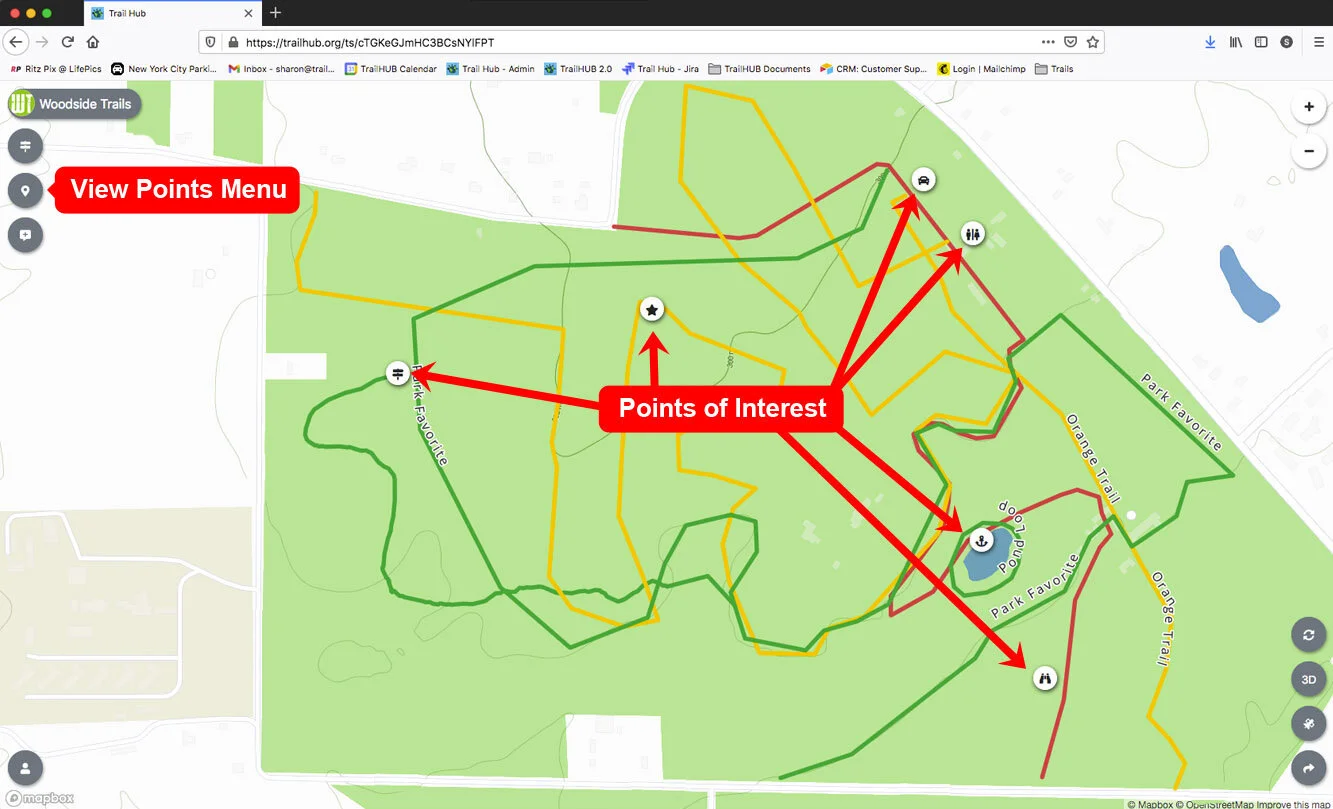
#Point types
| Group | Types |
|---|---|
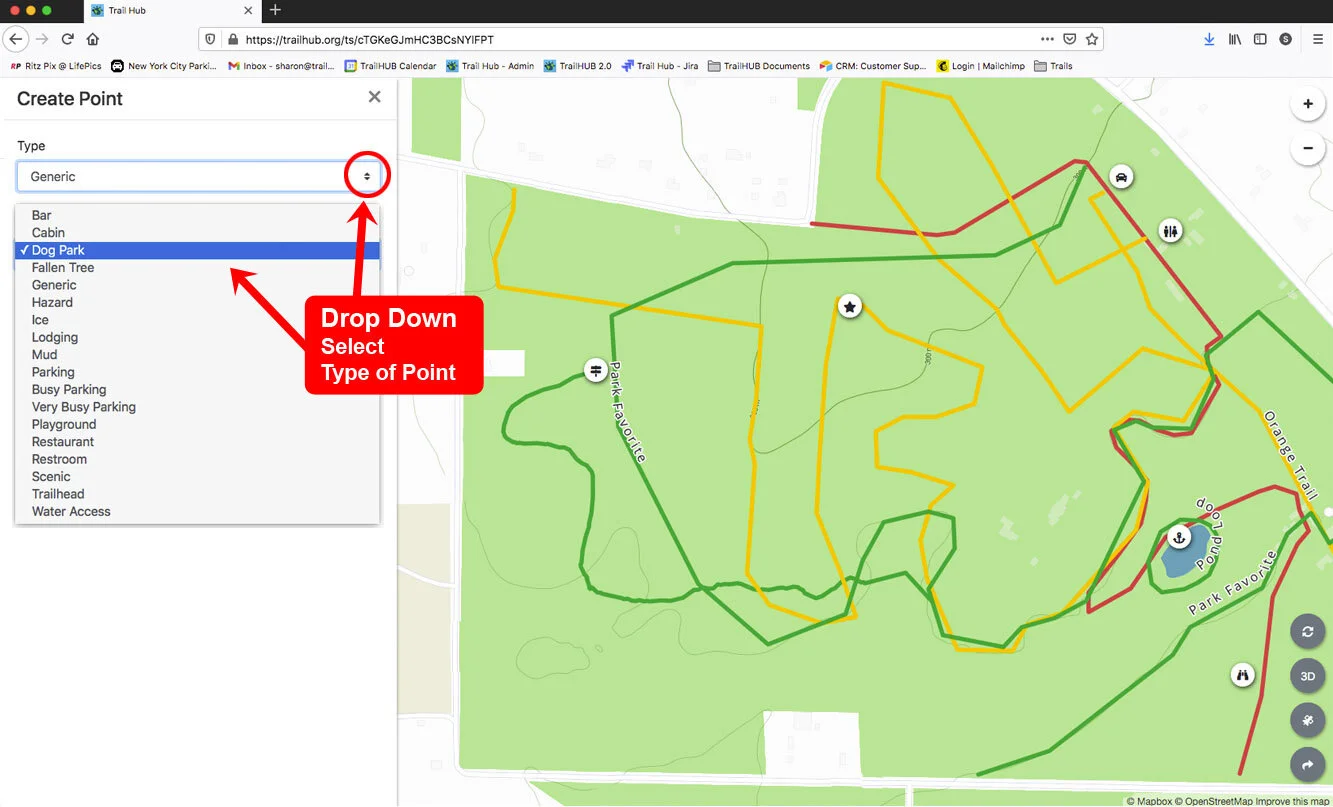
| Access and parking | Trailhead, Parking, Busy Parking, Very Busy Parking, Water Access |
| Facilities and services | Lodge, Lodging, Cabin, Yurt, Restaurant, Bar, Dining *, Restroom, First Aid, Playground, Dog Park, Ice Rink |
| Activities and scenery | Scenic, Fishing, Fly Fishing, Web Cam |
| Hazards and conditions | Hazard, Fallen Tree, Ice, Mud, General Warning, General Danger |
| Information | General Information, Generic, Wait Time * |
* Dining and Wait Time points are only available on the Double Diamond and Star plans. On other plans you can still select them, but the extra fields are replaced by a notice and the point behaves like a plain marker. See Plans and pricing.
If no type fits, use Generic and describe the location in the name and description. To suggest a new type, send a request through the contact form.
Some types carry extra fields:
- Web Cam: a Webcam URL. YouTube livestream links are supported and play inside the point's detail drawer.
- Wait Time: an Estimated Wait Time in Minutes, rendered as a number on the map. See Lifts and wait times.
- Dining: a weekly set of menus with times. See Dining menus.
#Add a point
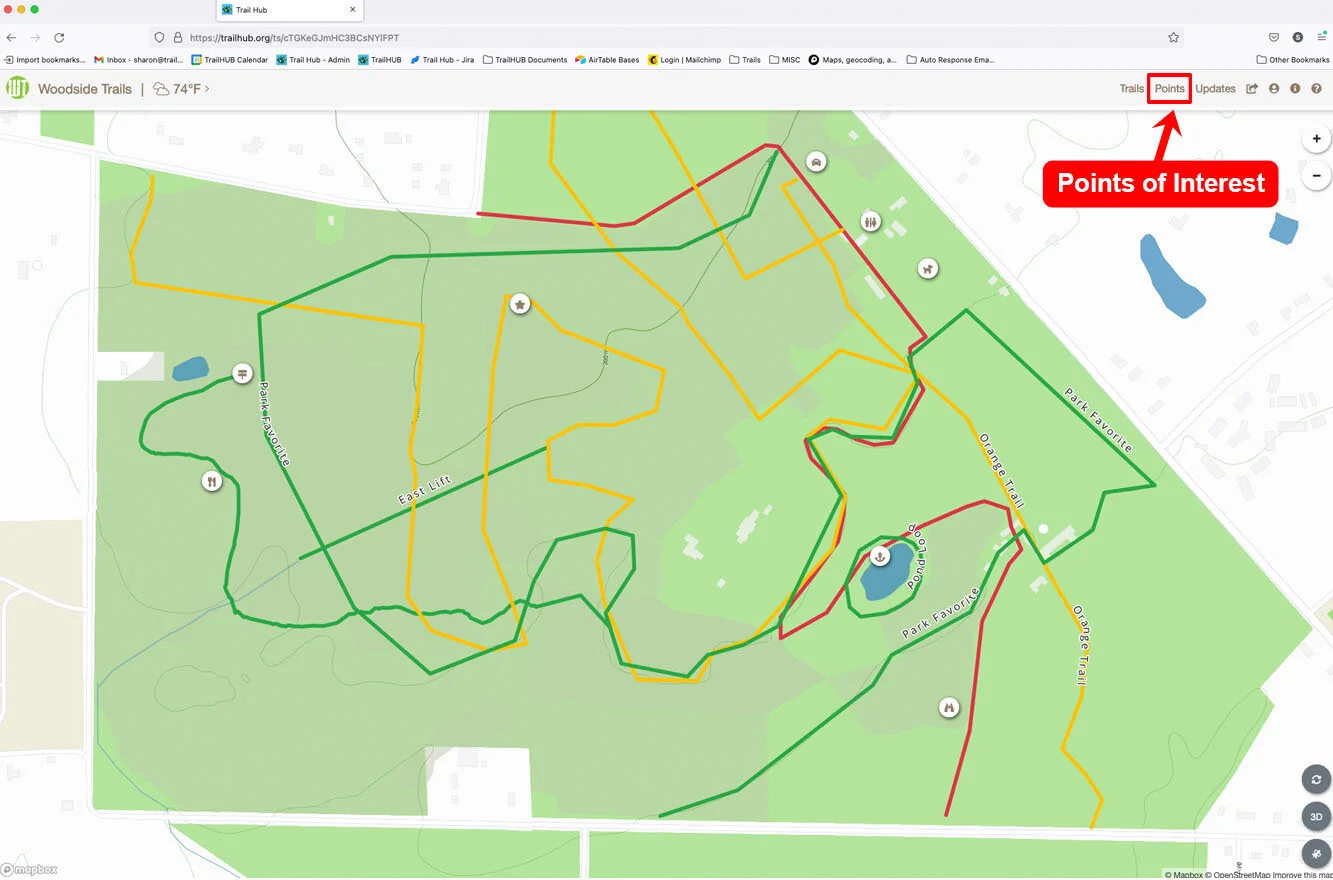
Click Points in the top navigation bar.
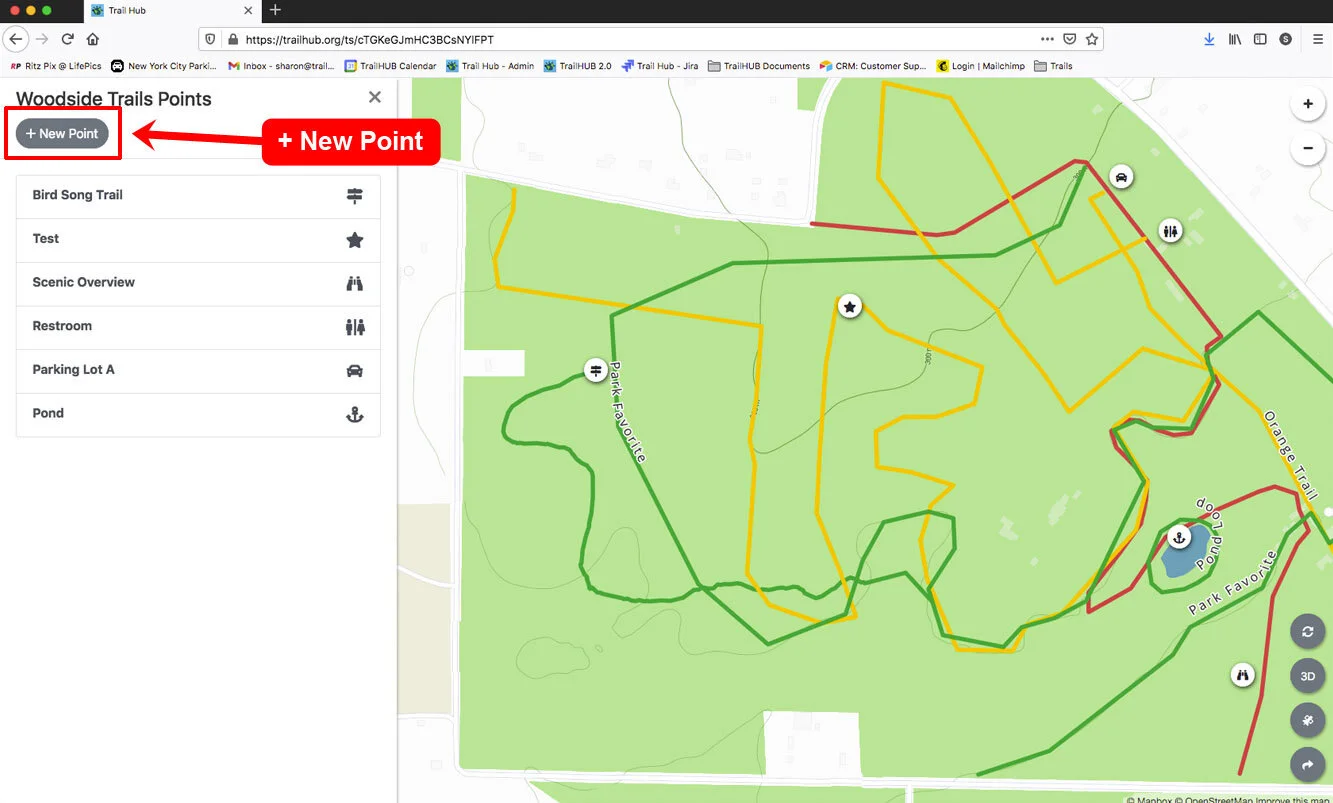
Click New Point.
Choose the Type from the dropdown.
Enter a Name (required). This is the label visitors see on the map.
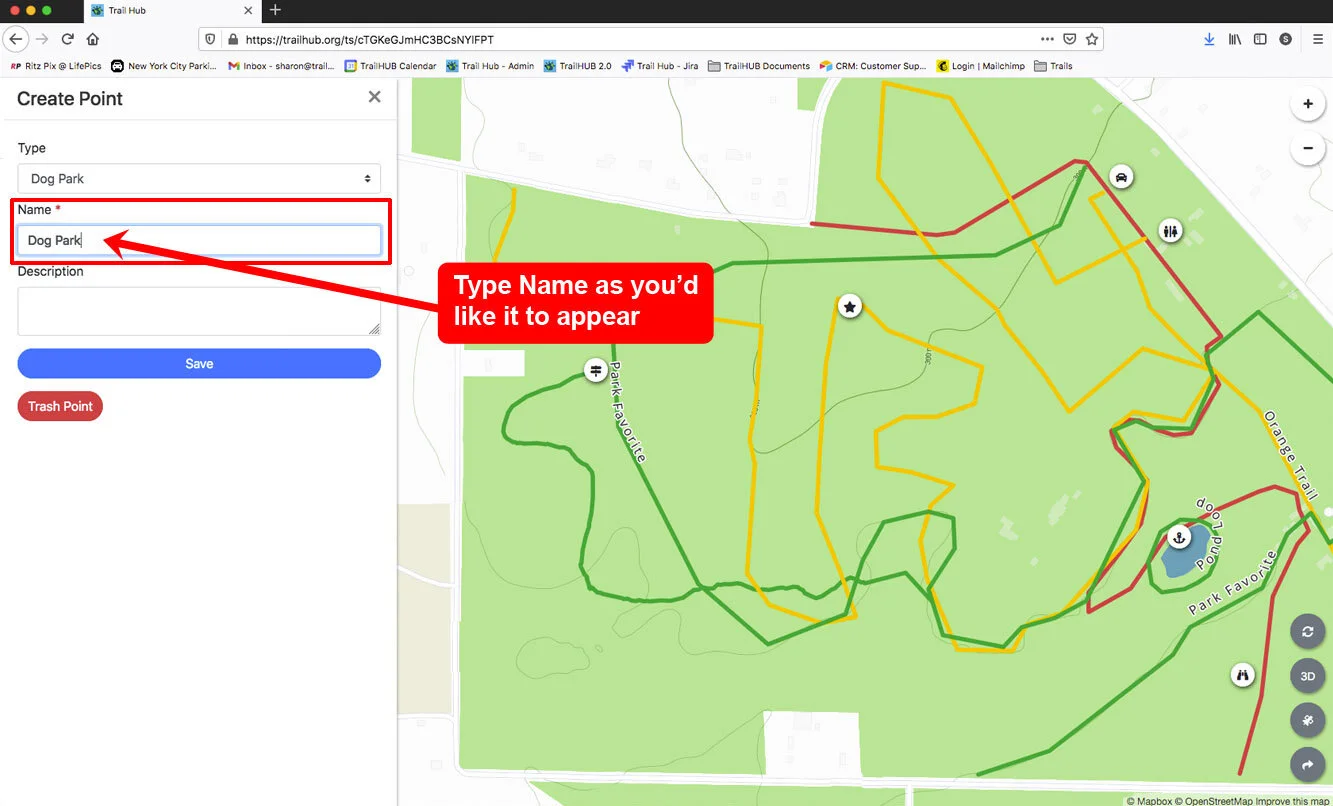
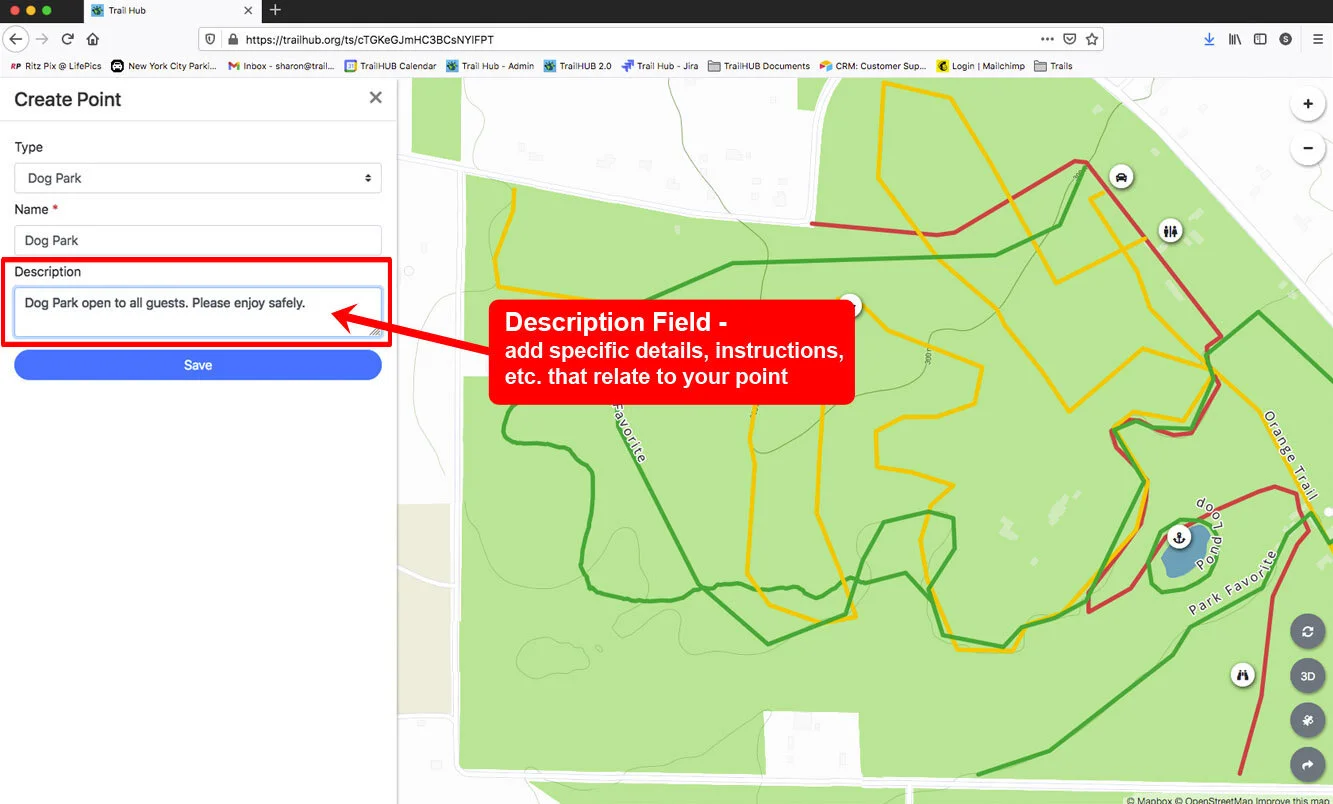
Add a Description with any details or instructions.
Set the Status: Open, Caution, or Closed. Closed and Caution points show a status badge on the map.
Switch on Point Hidden if the point should not be visible to the public yet.
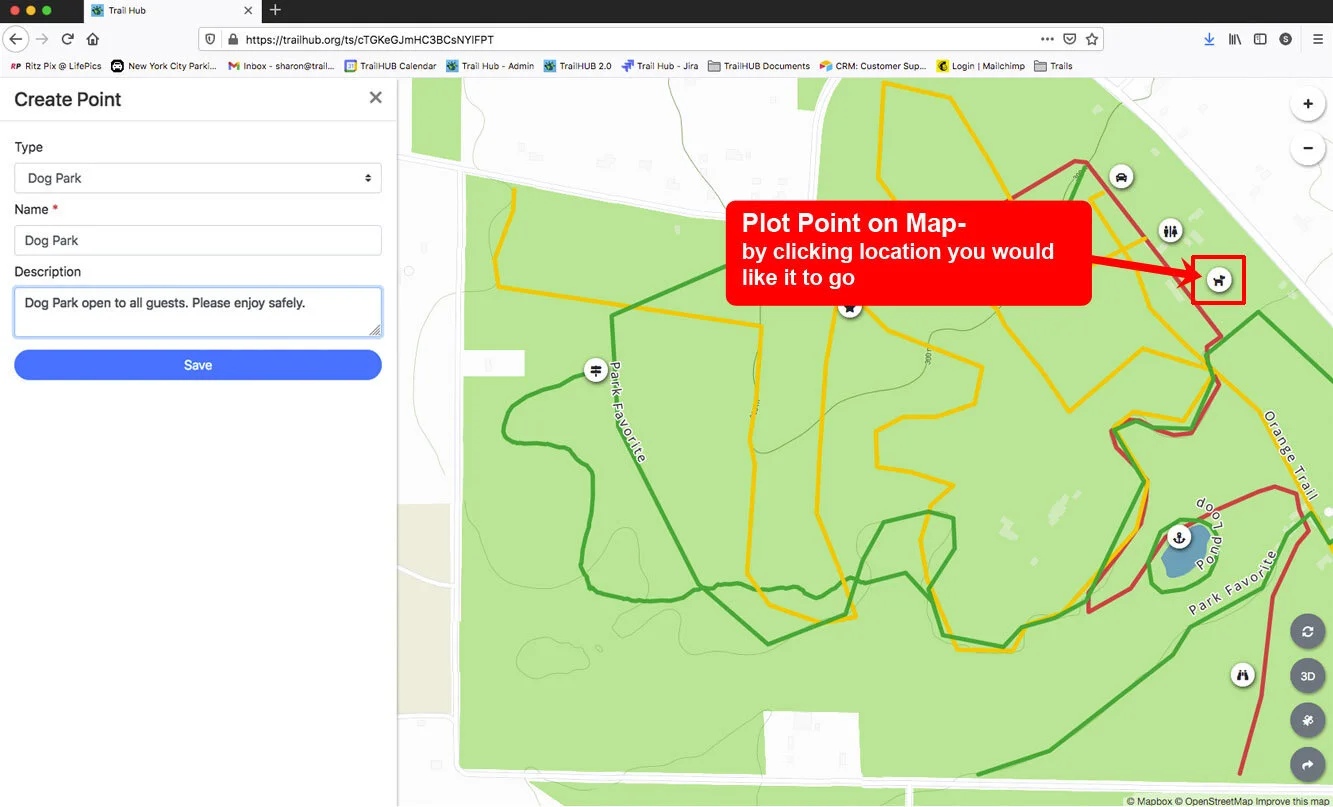
Place the point by clicking its location on the map. A search box appears in the top-right corner of the map while you are editing; use it to jump to an address or place name, then click to drop the marker. Click again to move it.
Click Save. A location and a name are both required.
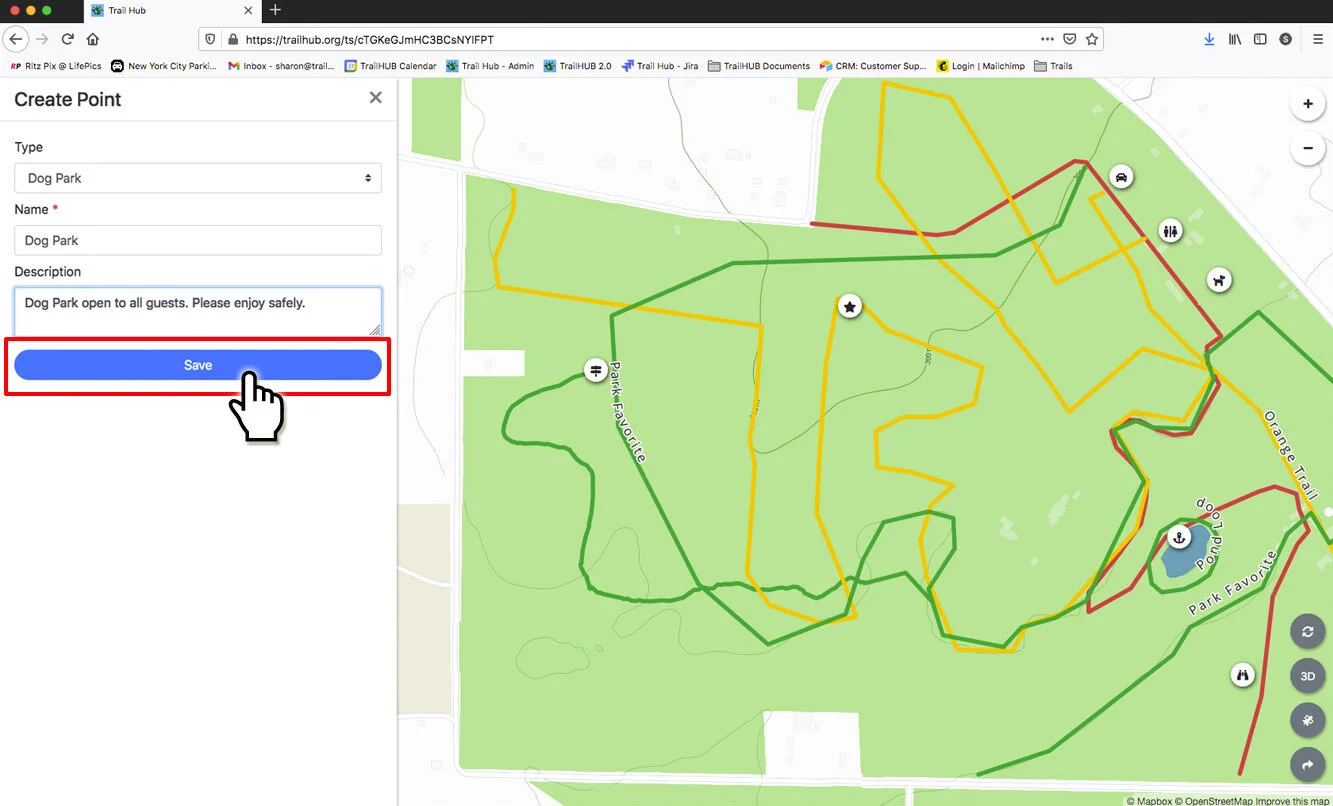
The point appears on the map and in the list in the Points of Interest drawer.
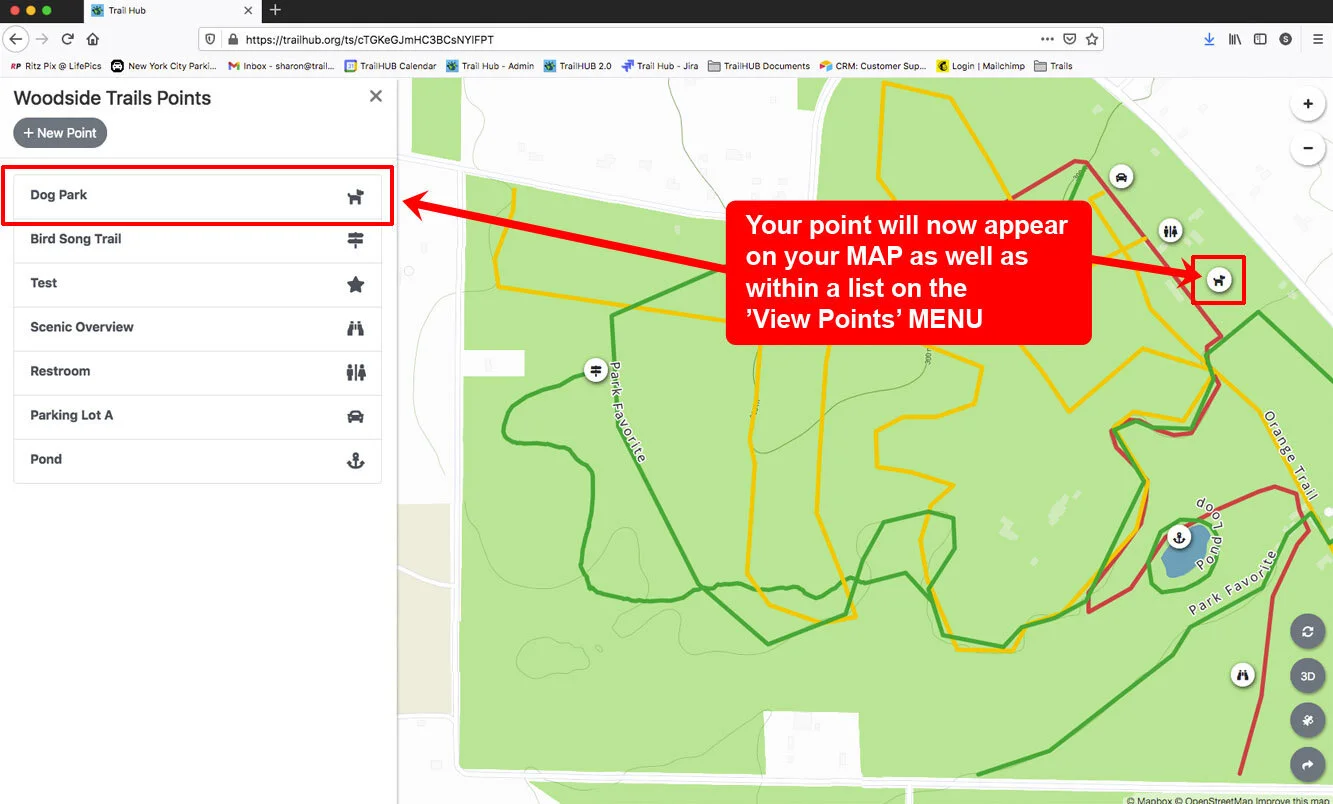
Click a point on the map or in the list to open its detail drawer. Visitors see the same drawer without the Edit Point button.
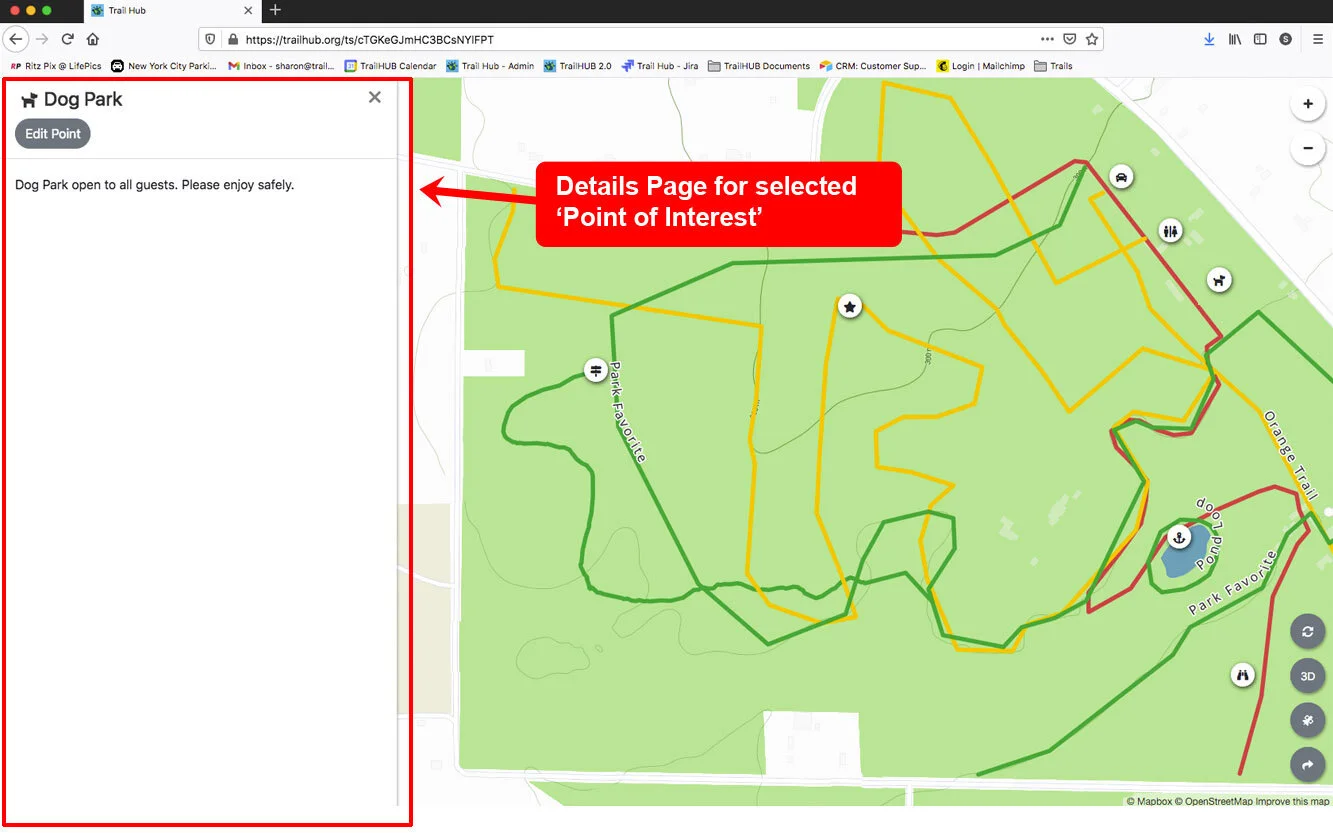
#Edit or delete a point
Click the point on the map or in the Points of Interest list.
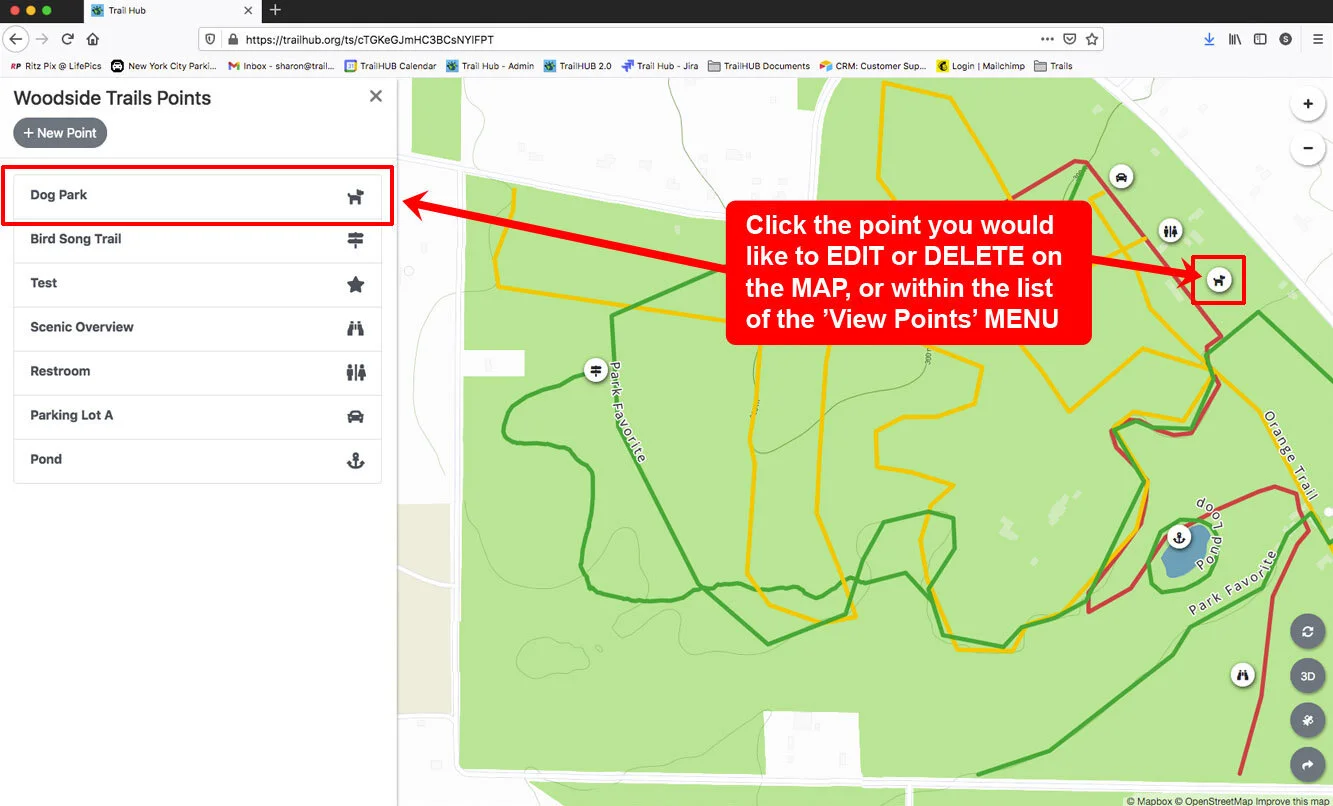
Click Edit Point.
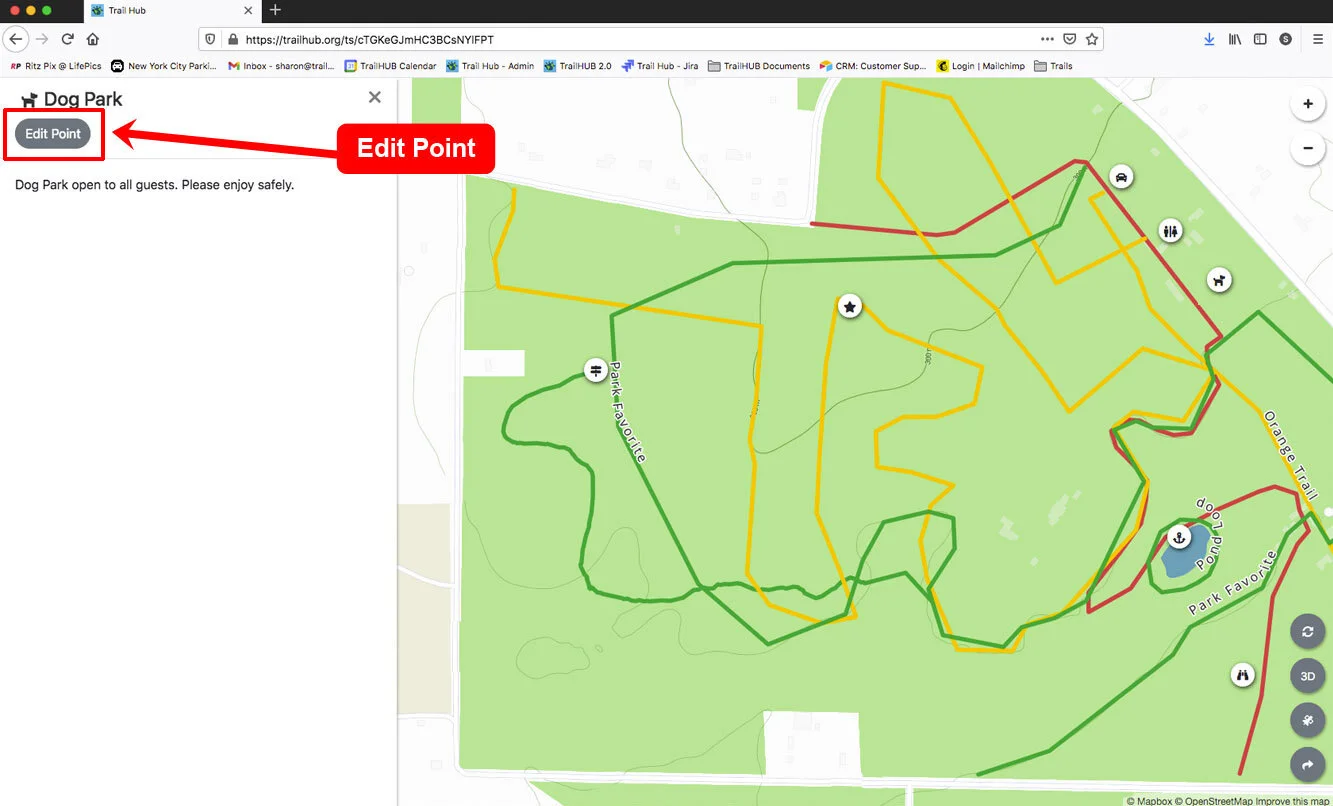
To edit, make your changes and click Save.
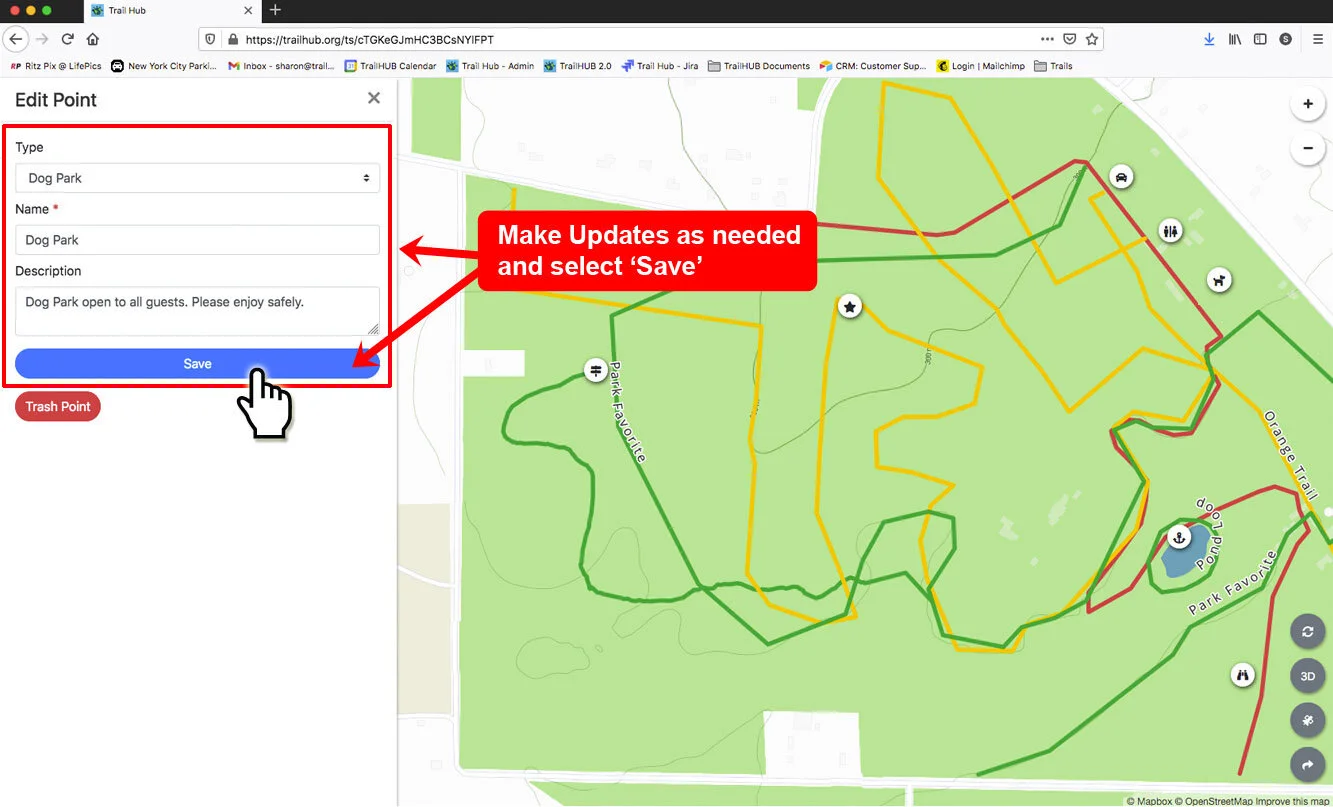
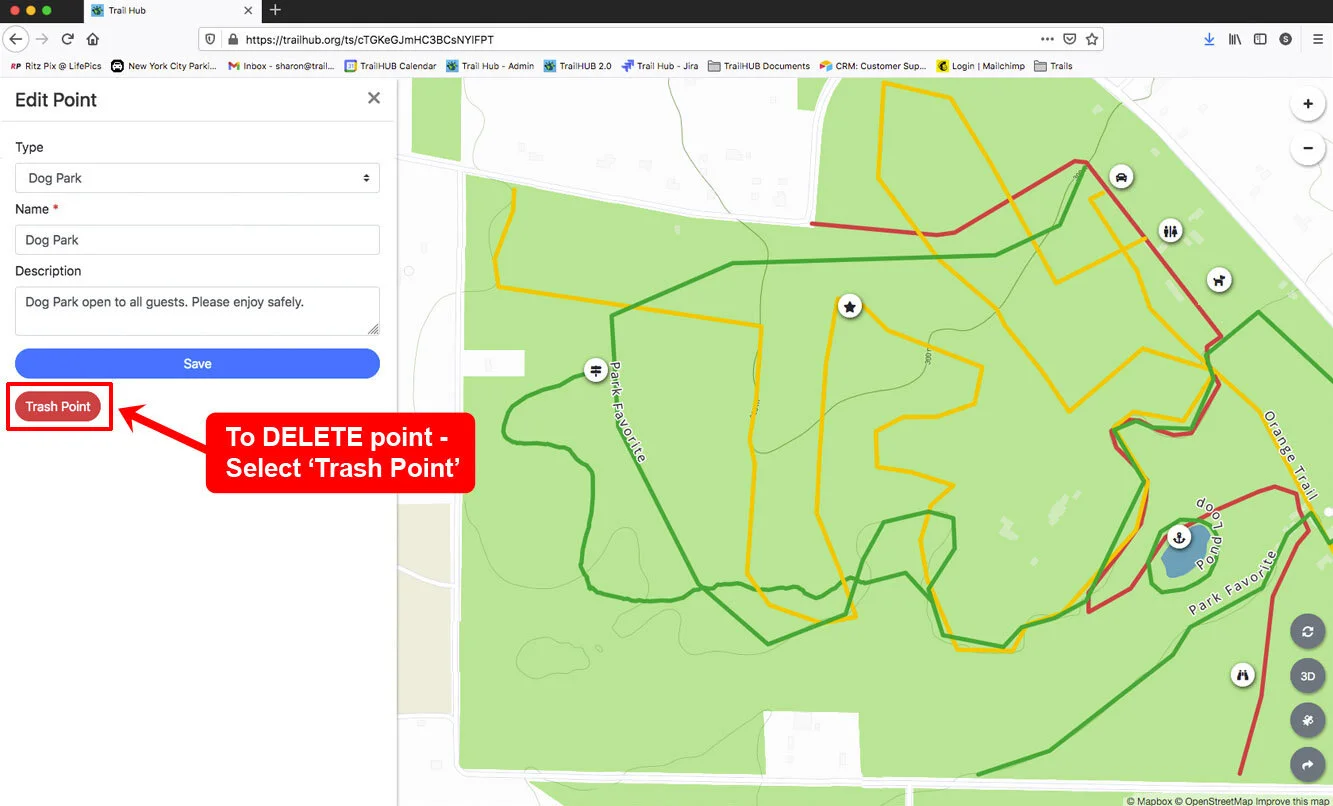
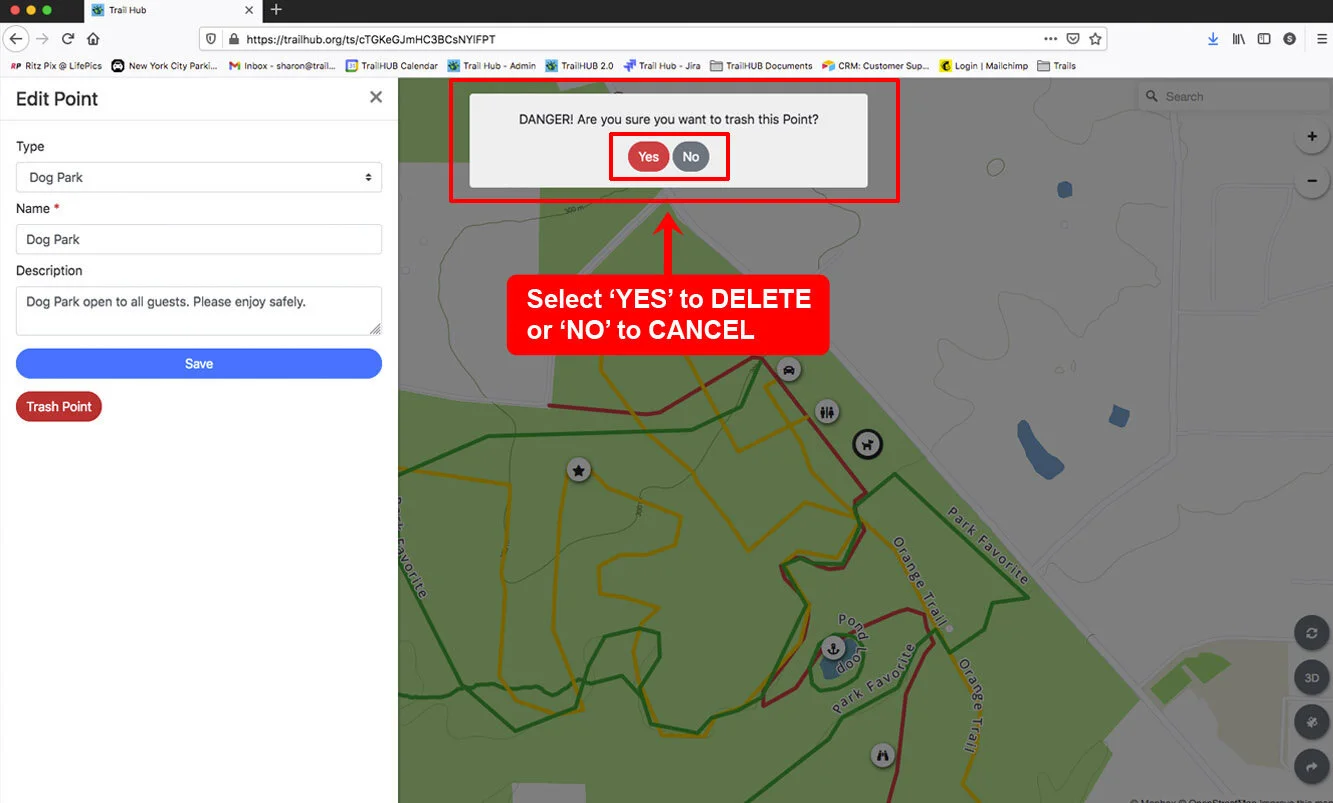
To delete, click Trash Point and confirm the prompt Are you sure you want to trash this Point?
#Other map features
#In this section
- Lifts and Wait Times
Add lifts to your map as dashed, status-colored lines and post live wait times as numbered points.
- Dining Menus
Publish daily menus with serving times at dining locations around your trail system using a Dining point.
- Weather
Show current conditions and a 7-day forecast for your trail system's location, sourced from OpenWeather.